This post may contain affiliate links. Please read our disclosure policy.

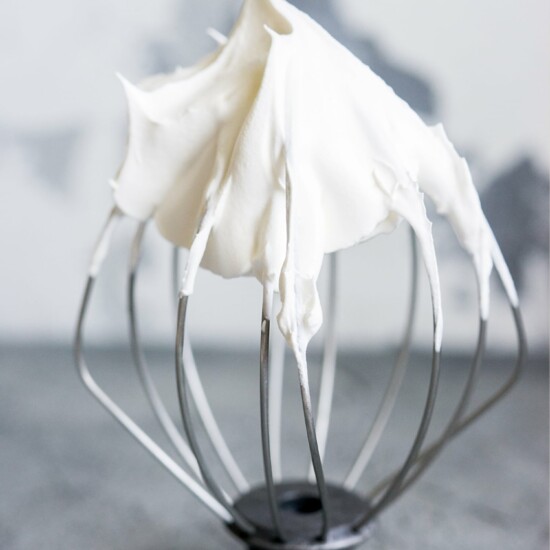
This coconut whipped cream is light, fluffy, and creamy! It’s super easy and made from a can of coconut milk or coconut cream, so it’s dairy free! Plenty of tips and tricks and my recommend brands included below.

I’ve been perfecting my coconut whipped cream recipe for over a decade, and it’s still one of my favorite things to make. You can put it on top of desserts, pies, or eat it with fruit. In fact, it was one of the first recipes I put in my book, Coconuts and Kettlebells, because I knew it would pair so well with all of my desserts recipes!
Because I get so many questions about how to make this, today I’m going over everything you need to know about making dairy free whipped cream from a can of coconut milk or coconut cream. I’ve made this 100+ times with a variety of different brands of coconut milk so you don’t have to. Whether you want to make this recipe for the first time, or you just can’t seem to get it right—don’t worry, I got you!
Jump to:
What is Coconut Whipped Cream?
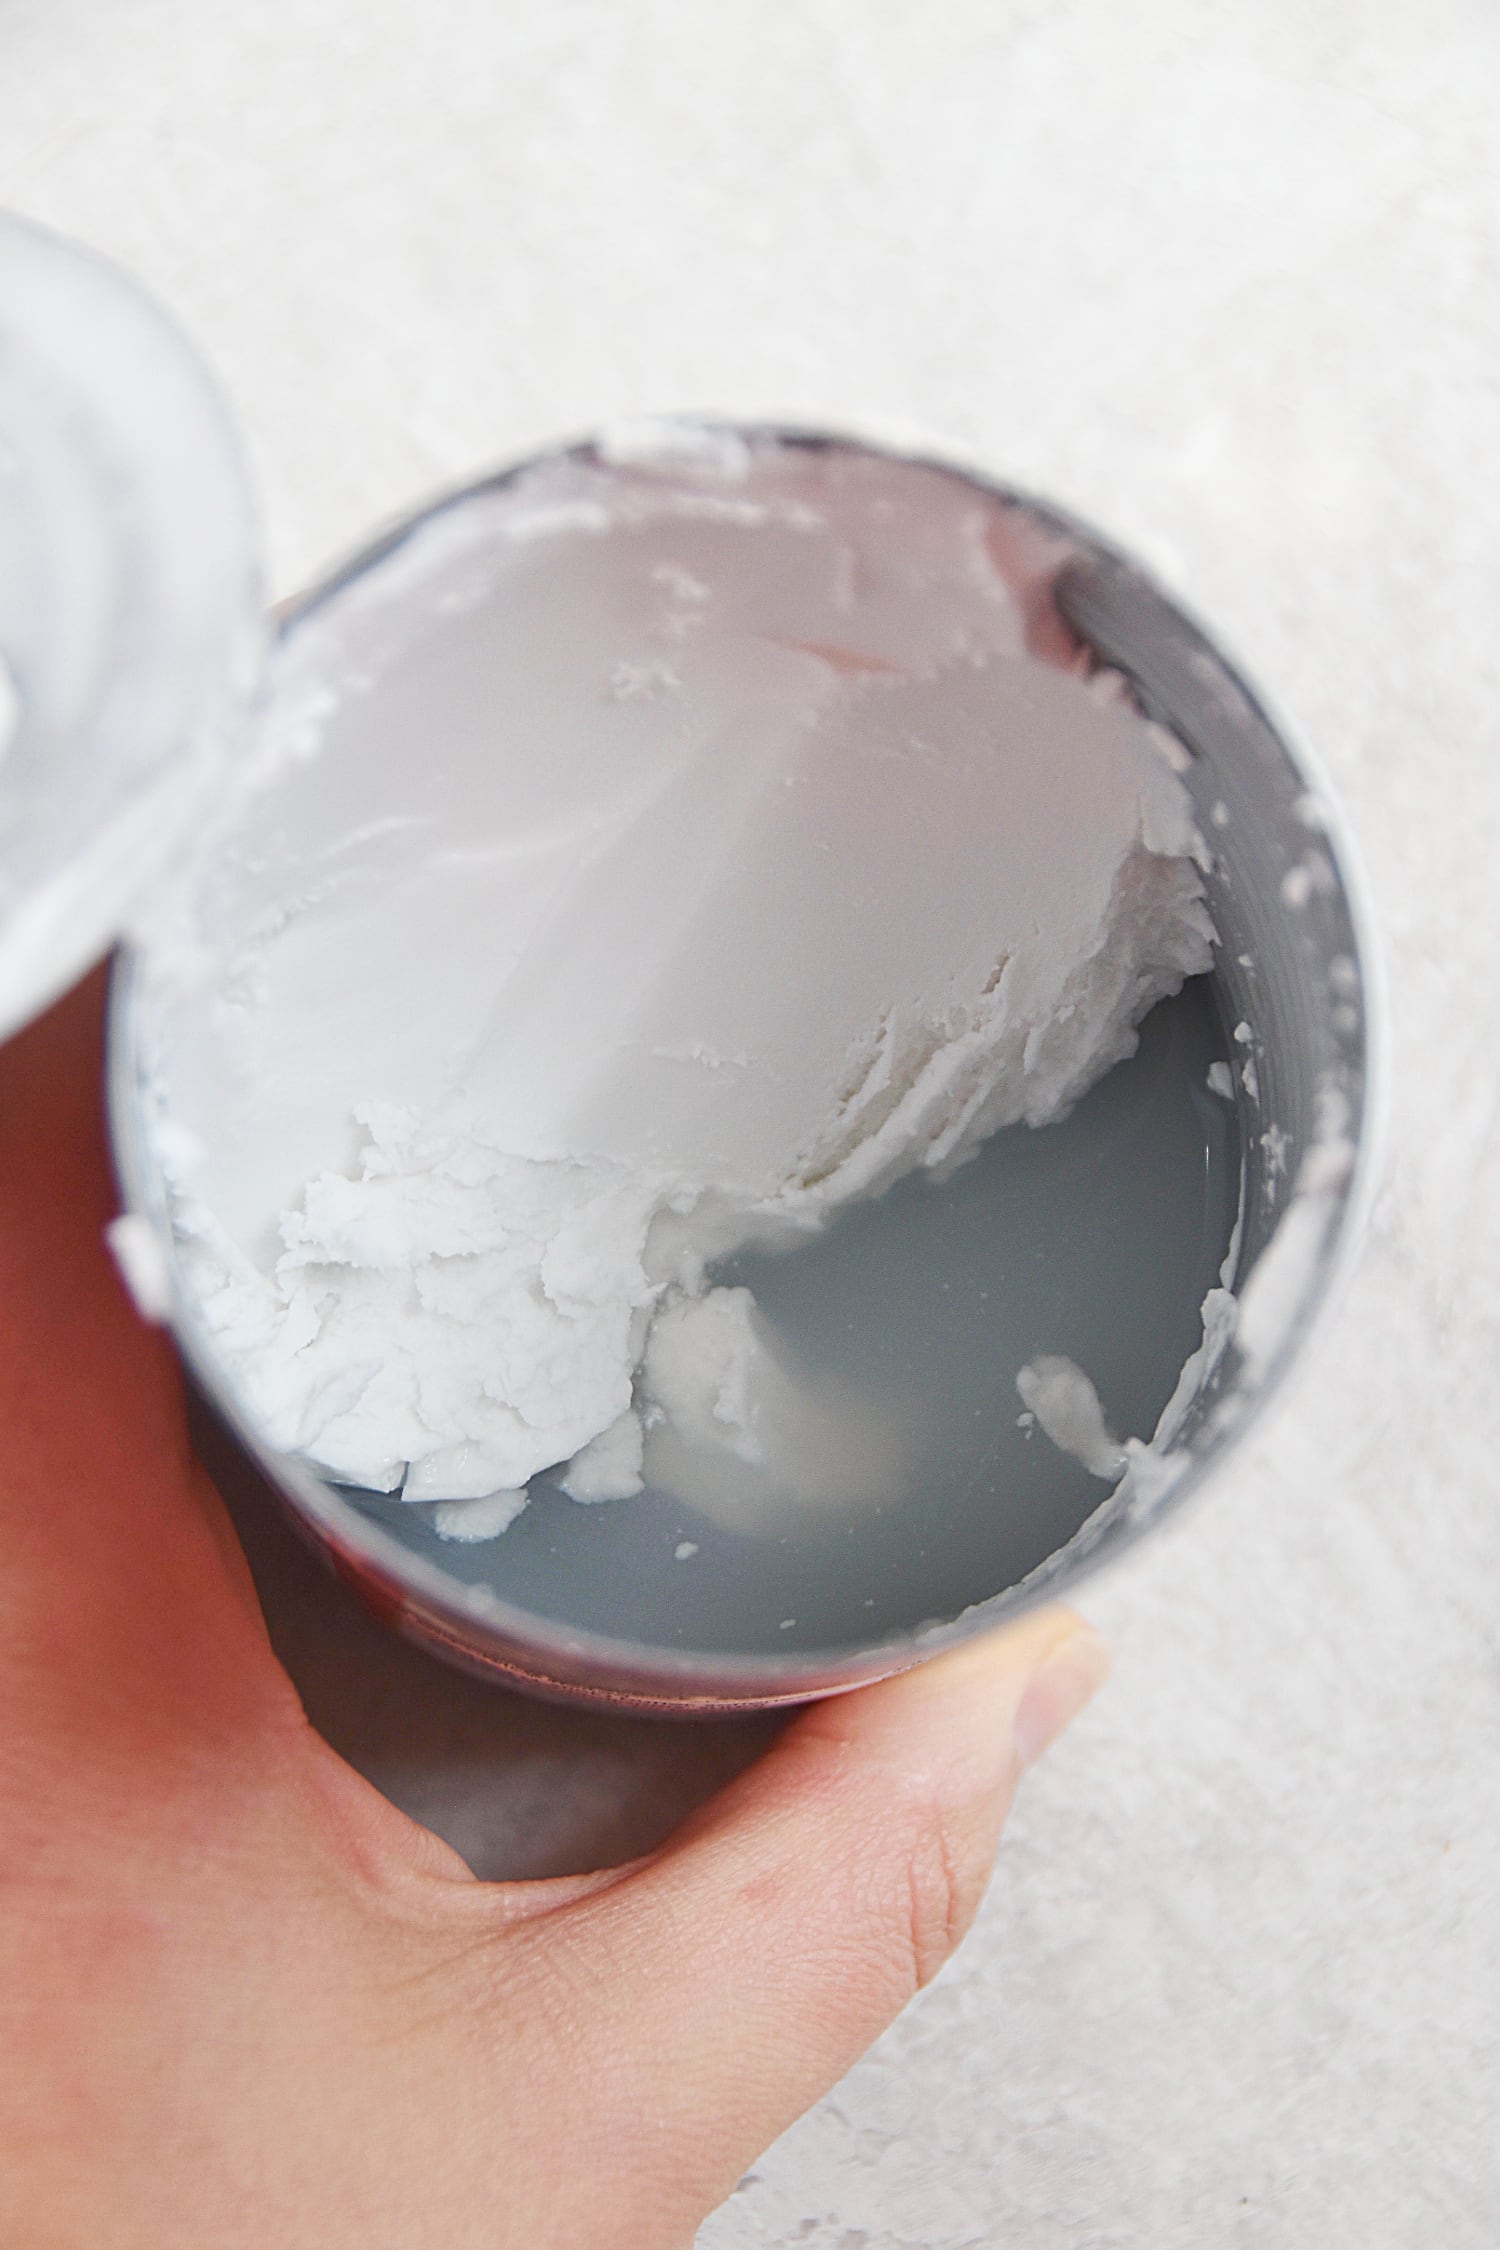
Coconut whipped cream is solid coconut cream that has been whipped to make it more light and fluffy. The solid coconut cream comes from a chilled can of coconut milk or coconut cream. Why chilled? It separates the coconut cream solids from the coconut water. It’s an incredible dairy-free, vegan, and paleo whipped cream, and can be used as a topping for fruit, warm beverages, and treats.
You can make it from either a can of full-fat coconut milk or a can of coconut cream. Not sure about the difference between coconut cream or coconut milk? Check out Coconut Milk vs Coconut Cream: What’s the Difference?.
For both options, you’ll need to place the can in the refrigerator overnight so the coconut solids separate from the water. Then, scoop out the coconut cream that has separated to the top, and whip it. Below, I’ve included the different brands of coconut milk and coconut cream that work best for this recipe.

How to Make Coconut Whipped Cream
- Chill: Chill your can of full-fat coconut milk in the fridge overnight. Do not skip or shorten this step. The next day, chill your mixing bowl and beaters in the fridge for 10 minutes.
- Scoop Out the Cream: Open the can of coconut milk and scoop out the solid cream that has separated to the top into a mixing bowl. Pour the coconut water that remains into a mason jar to use for smoothies or other recipes.
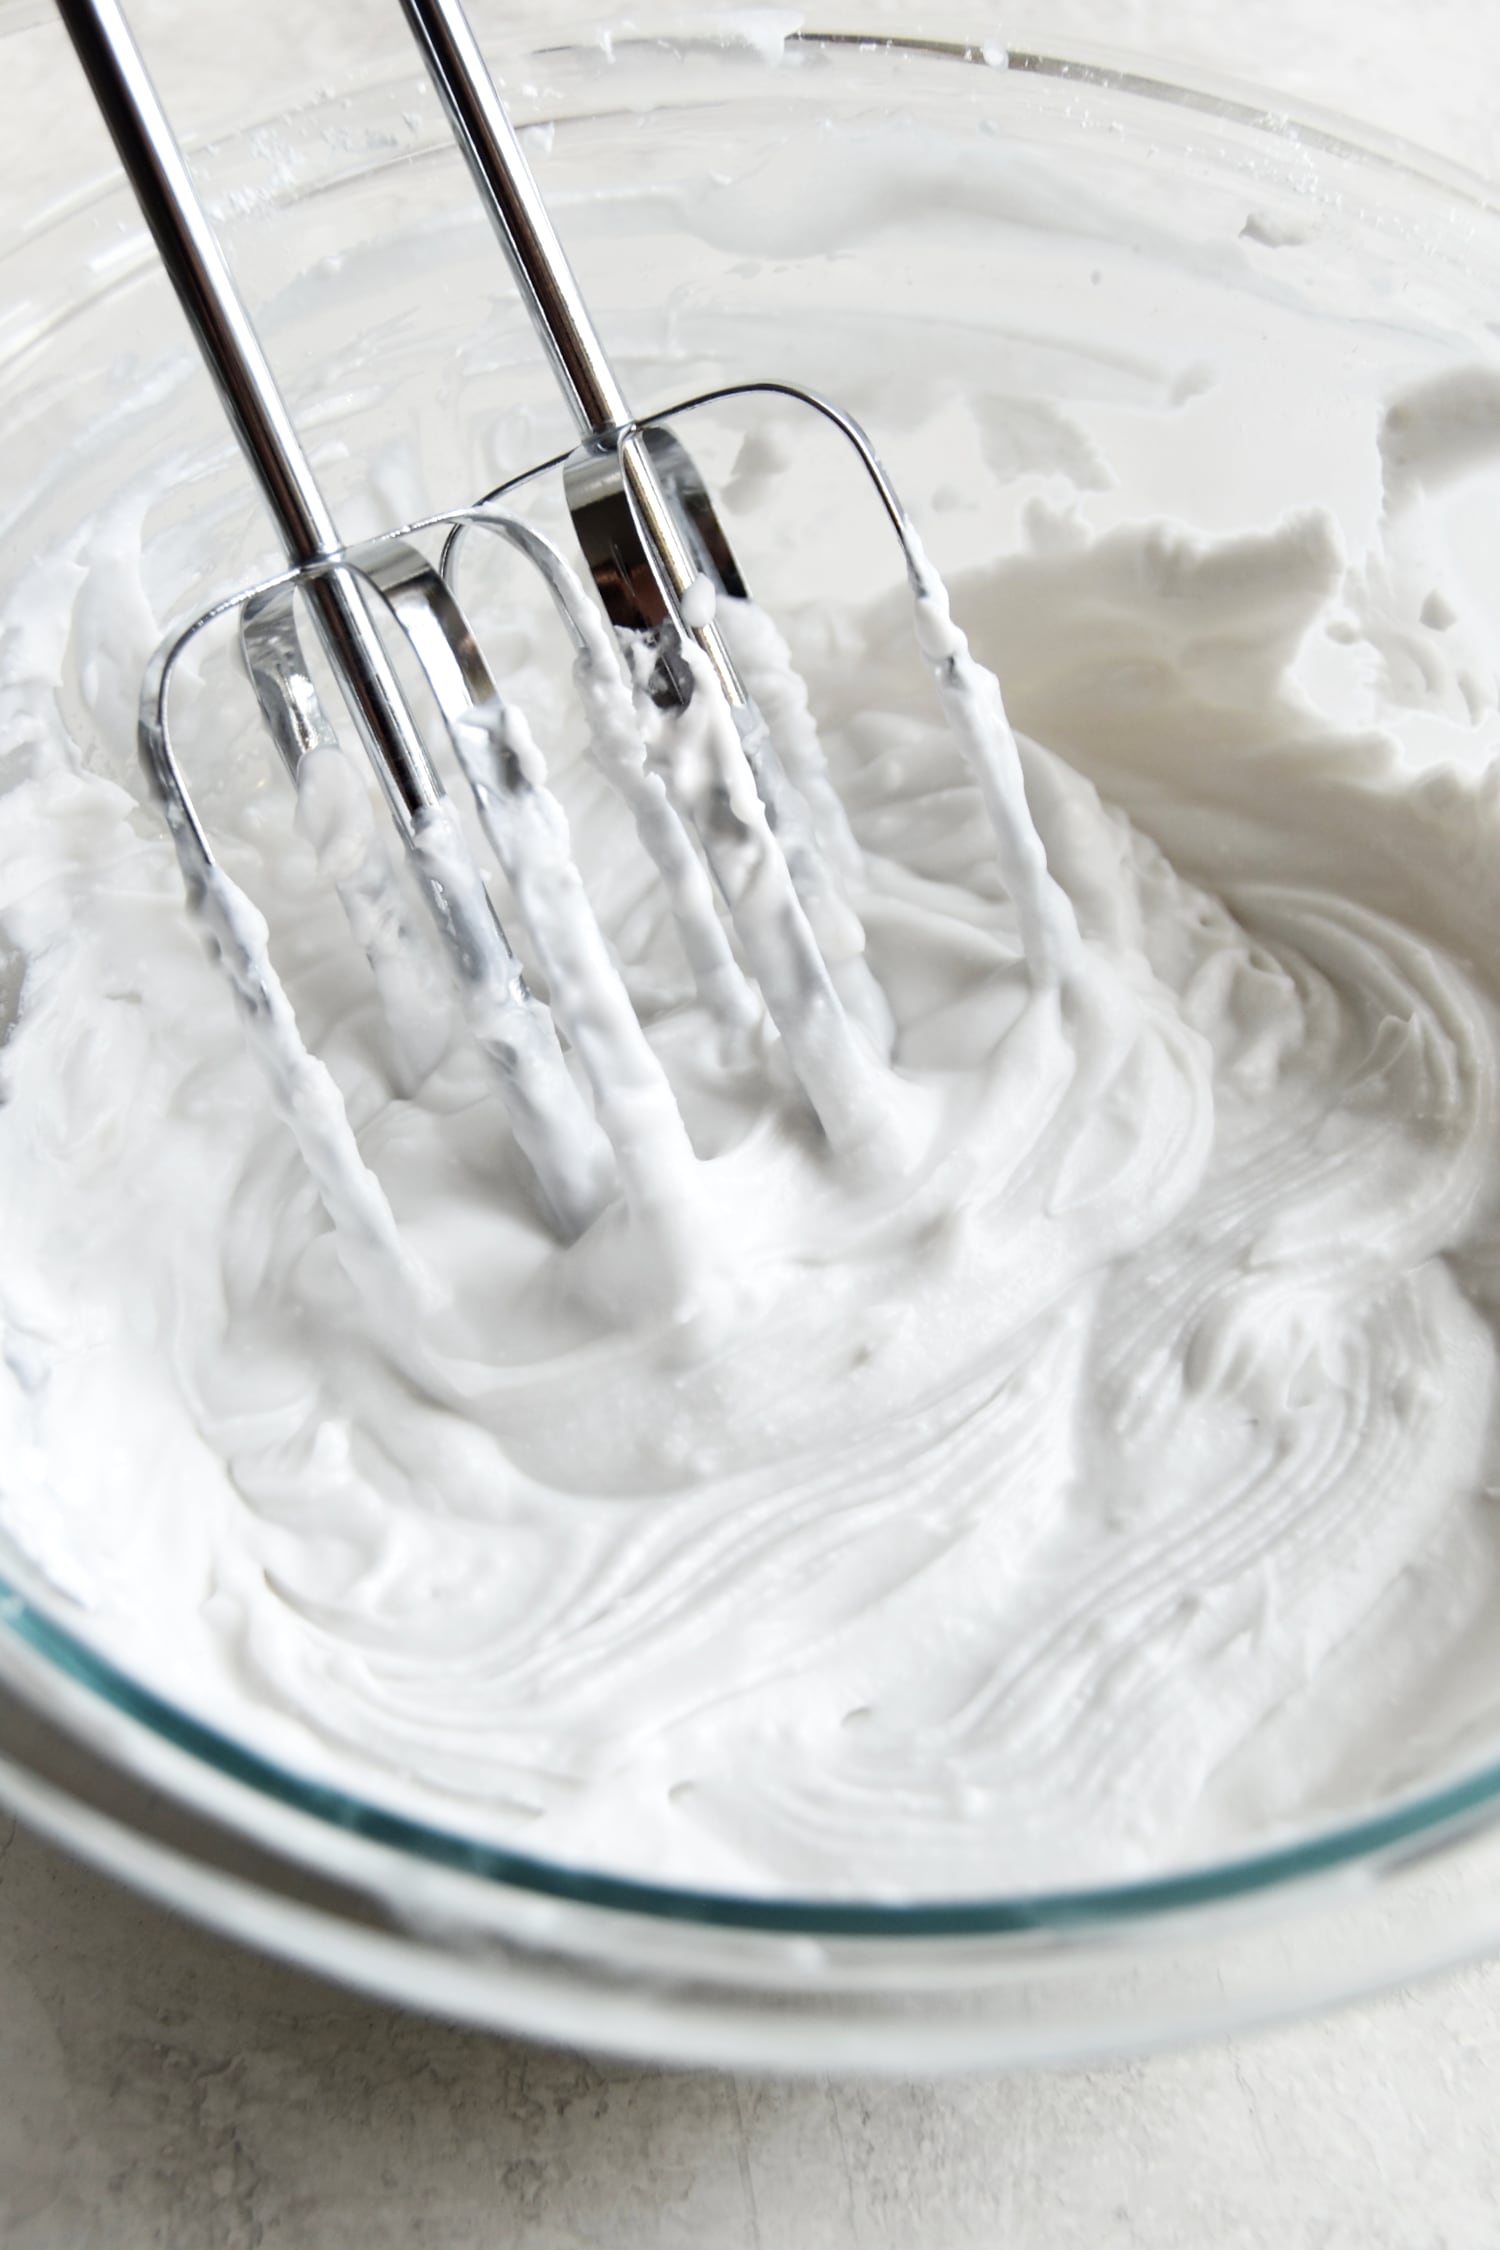
- Beat: Using a hand or stand mixer, beat the coconut cream on medium speed for about 30-45 seconds, or until the cream becomes light and smooth and soft peaks form. Do not over-whip!
- Add Sweetener: Add your sweetener of choice and vanilla extract. Beat the cream until incorporated. If your whipped cream is a little thick, add back some of the coconut water 1 teaspoon at a time until light and fluffy.
- Serve: Serve on top of fruit, baked goods, or hot cocoa. Store in the refrigerator for up to a week.
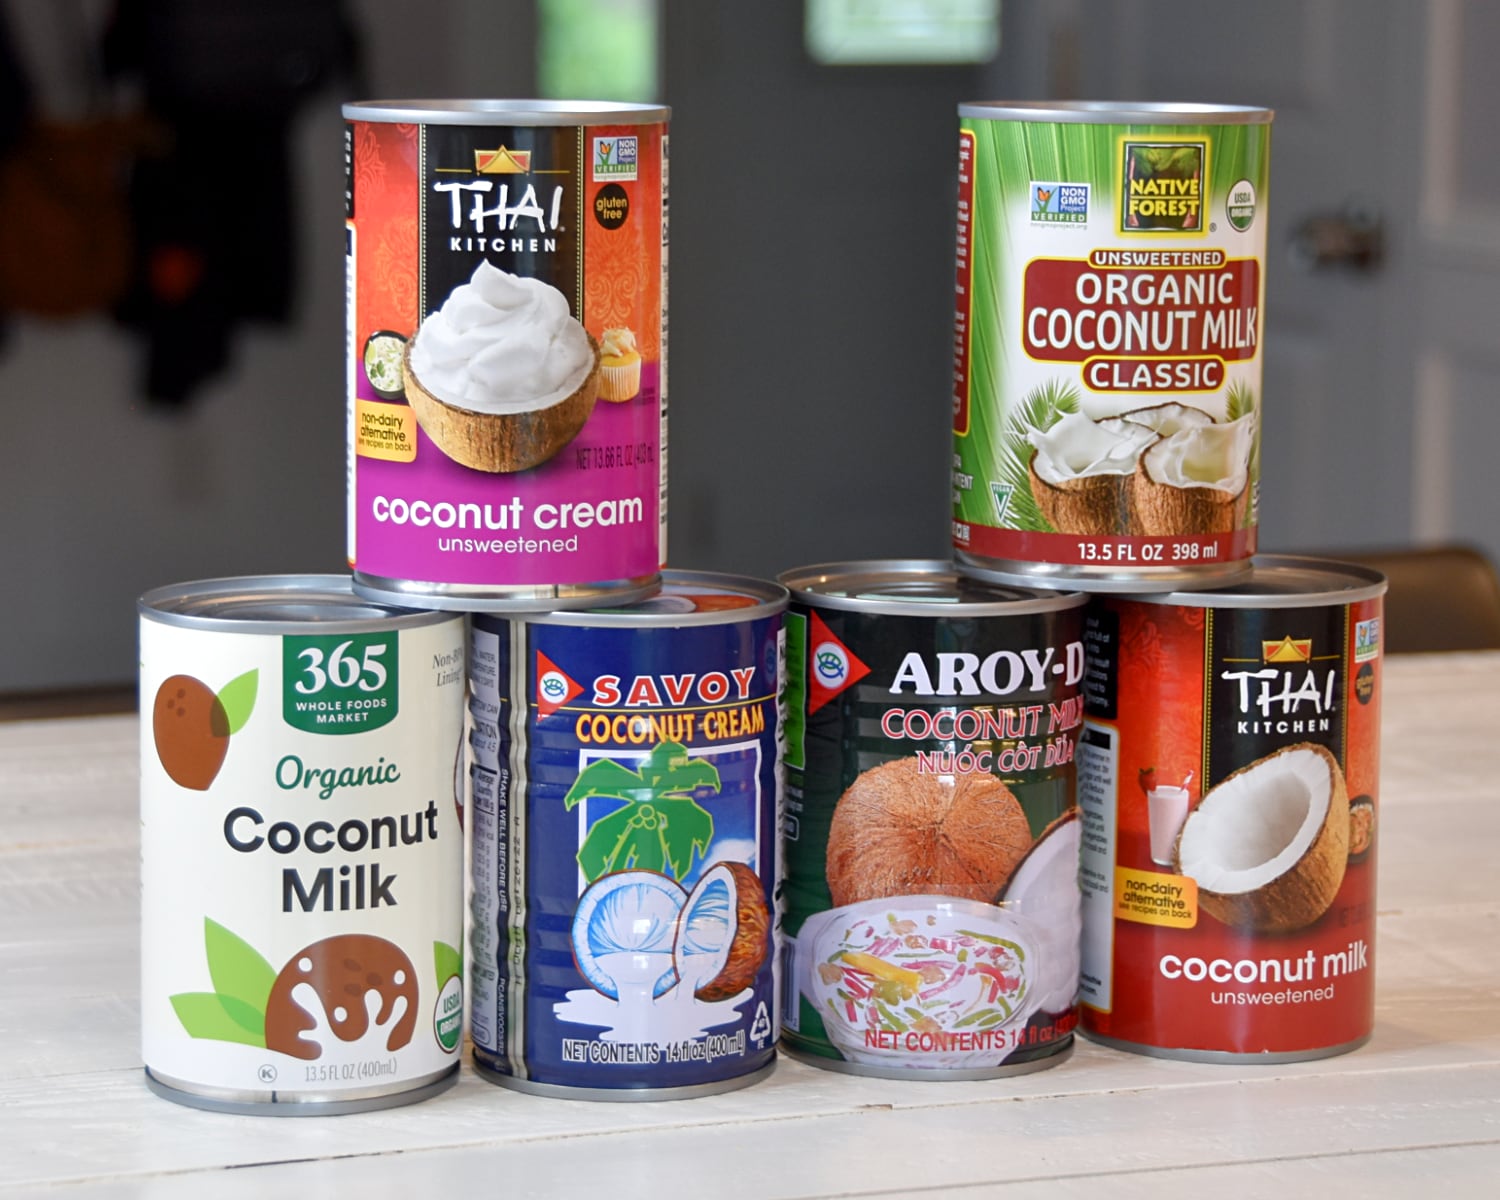
The Best Brands of Coconut Milk + Coconut Cream
Over the years, I’ve tested many brands of coconut milk for coconut milk whipped cream. I started using Thai Coconut Milk, as it was the only brand available, and slowly more brands started making coconut milk. I can distinctly remember the day I found Trader Joe’s was making coconut milk!
But, not all coconut milk is created equal. Certain canned coconut milk brands do not contain enough fat, or have a grainy and gritty texture, so they won’t work well. To save you time and effort, here’s my cheat sheet for the best brands:
- Thai Kitchen Coconut Cream — Great! — This is the most consistent coconut cream and my go-to! It always separates into a solid coconut cream and coconut water. And, you get way more coconut cream than you would with coconut milk! You’ll need to add back a couple teaspoons of coconut water when whipping to make it light and fluffy. This brand is a little more chunky, so after whipping, smooth out the small chunks against the bowl with a spatula.
- 365 Organic Coconut Milk (Whole Foods brand) — Great! — This works well! Chilling overnight results it very solid coconut cream. When making it, you will need to add back a couple teaspoons of coconut water when whipping to make it light and fluffy.
- Native Forest Organic Coconut Milk — Great! — My third favorite option, this coconut milk separates into a very solid coconut cream in the fridge. You may need to add a teaspoon of coconut water while whipping to make it light and fluffy.
- Savory Coconut Cream — Great! — Incredible texture! This is the best brand of coconut cream for this recipe. You’ll get mostly coconut cream, and it’s super light and fluffy right out of the can.
- Aroy-D Coconut Milk — Great! — Another winner! This separates well in the fridge, and the coconut cream scoops out nice and fluffy. Minimal water in the bottom of the can.
- Thai Kitchen Coconut Milk — Great! — After chilling, the coconut water and coconut cream separates perfectly! The cream is pretty thick, so you’ll need to add back a couple teaspoons of coconut water when whipping to make it light and fluffy. This brand is a little more chunky, so after whipping, smooth out the small chunks against the bowl with a spatula.
- Native Forest Simple Organic Coconut Milk — OK — This works, but not great. It’s a little gritty and not as creamy when whipped. It’s an option for paleo whipped cream because it’s simply organic coconut and water.
- Thrive Market Coconut Milk — No — This didn’t separate very well, so I only got about 3-4 tablespoons of coconut cream out of the can before it became watery cream. You can use this in a pinch. Place the can in the freezer about 10 minute before you open it to encourage final separation. Try to avoid letting any water make it into the bowl, and add a bit of tapioca flour if it’s runny.
- Andre Prost Coconut Milk — No — I was hoping this would work since it’s available at Target and Kroger. But, it’s a complete miss. The coconut solids separate into a runny, lumpy cream. Avoid.
- Let’s Do Organic Heavy Coconut Cream — No — When I first saw this, I was almost positive it would work. Unfortunately, something is very wrong with the consistency and it doesn’t create coconut solids when chilled. Instead, it separates into coconut oil, and a milky coconut water. I tried this in the fridge and room temperature and this is how is separated every single time. I do know people who have had success with this, but at this time I can’t recommend it. Avoid.
- Trader Joe’s Coconut Milk — No — As tempting as it is because Trader Joe’s is awesome, their coconut milk is not great for whipped cream. I’ve tested it many times and it doesn’t work. Avoid.
- Trader Joe’s Coconut Cream — No — Only slightly better than the coconut milk, this coconut cream is gritty and separates into little bits. It’s not smooth and it won’t whip into a light and fluffy whipped cream. Avoid.
Quick Tips for Success
- Only use a can of full-fat coconut milk or coconut cream.
- Jiggle the coconut milk cans at the store. Try to find one that doesn’t slosh around and is already separated.
- Use one of the top brands mentioned above for best results.
- Avoid shaking your can(s) of coconut milk. Shaking mixes the emulsifiers and will prevent separation.
- Place the can in the back of the fridge at the bottom for a full 24 hours before making the whipped cream. Make sure your fridge gets cold enough, especially during summer months.
- Put a few cans in the fridge so you have a spare.
- About 10 minutes before you start making the whipped cream, place your mixing bowl and beaters in the fridge to chill.
- When scooping out the coconut cream, don’t let any of the liquid come along.
- If your cream is a little runny after whipping, add 1-3 tablespoons of tapioca flour to the whipped cream while whipping. Place it in the fridge to chill for 2-3 hours to let it firm up before eating.
- Do not over-whip. This will result in grainy whipped cream.
Does It Need to Be Refrigerated?
Yes! Store it in an airtight container in the refrigerator for up to a week. The longer it sits in the fridge, the more it will firm up. To use it again, lay it out at room temperature until it softens, then re-whip it as needed. If it has dried out a bit, try adding just a tiny bit of coconut or filtered water while whipping.

Can I Use Coconut Milk From a Carton?
No. Coconut milk from a carton will not separate in the refrigerator. It typically has a higher water content and more fillers than canned coconut milk so that it won’t separate in the fridge. Canned coconut milk has minimal ingredients and a higher fat content.
Can I Use Canned Lite Coconut Milk?
No. Lite coconut milk is simply coconut milk with less fat and more water. It’s sort of the opposite of coconut cream. While it may separate slightly in the fridge, it will be very runny and you’ll get very little coconut cream from the can.
Can I Make it Without Chilling the Can?
As tempting as it is to skip the chilling process, you cannot make coconut whipped cream without chilling the can in the refrigerator overnight. Even if you are using a can of coconut cream, you still need to chill the can overnight to separate all of the coconut water from the solid coconut cream. I’ve tried different chilling times, and even as much as six hours isn’t enough. Freezing it will not speed up the process. It will just freeze the water and coconut cream together.
Plan ahead and place a couple cans of coconut milk in the back of the fridge at the bottom at least 24 hours before you’ll be using it. If you plan to make the recipe in the future, just store your cans of coconut milk in the fridge so you’ll have a can or two ready to go when you want some. Go put them in the fridge now. I’ll wait here.
Why Isn’t My Coconut Cream Whipping?
The most common reason your coconut cream won’t whip is because it wasn’t chilled sufficiently. Chilling overnight is key. If you don’t, the coconut solid won’t harden and separate from the liquid. Too much liquid will result in soupy and creamy cream that doesn’t whip.
Place your can of coconut milk or coconut cream in the back of the fridge on a bottom shelf for a full 24 hours before opening the can and removing the cream. If your refrigerator doesn’t cool very well or it’s an extremely warm day and you’re in and out of the fridge a lot, this can also lead to the cream and coconut water not separating entirely. This is why I recommend placing your coconut milk in the back of the fridge at the bottom. When scooping out the coconut cream, do not let any of the coconut water come along for the ride.
As a special tip, I like to gently jiggle the cans of coconut milk at the store to find ones that are already separated. If you hear the coconut milk sloshing around when you pick it up, put it back.
The other common reason your coconut cream is being stubborn and won’t whip? Emulsifiers. Some brands of coconut milk contain a higher amount of emulsifiers and additives, which prevent the cream and water from separating. Check out my list of the best brands of coconut milk for consistent results.
How Do You Thicken Coconut Cream?
If your coconut whipped cream is runny, add 1-3 tablespoons of tapioca flour while whipping. You can also thicken it by putting it in the refrigerator. Place the whipped cream in the fridge for at least 2-3 hours to let it firm up.
Sometimes, this may be due to the type of coconut milk, or you may have just gotten a dud can that didn’t separate properly. Certain brands can be a little dicey in consistency because of sourcing, so make sure to check my recommended brands above.
Can I Make Coconut Whipped Cream With a Dispenser?
Yes you can! I love making dairy free whipped cream in a whipped cream dispenser! It’s actually my preferred way to make it. The texture is really light and fluffy, and it’s foolproof. Here’s how to make it with a whipped cream dispenser:
- Shake your can of coconut milk vigorously (I know, this is the opposite of what I tell you to do above!), and place the can in the refrigerator to chill overnight. You want cold, liquid coconut milk that isn’t separated. I like to shake the can a few more times in the fridge while it’s chilling.
- Once chilled, open the can and pour the cold coconut milk into a glass measuring cup. Add your sweetener and whisk until no clumps remain. If your coconut milk separated slightly or there are chunks of cream, whisk well or use an immersion blender to make it smooth. This will prevent the nozzle from becoming clogged.
- Pour the coconut milk into the canister and secure the lid. Follow the instructions for your whipped cream dispenser to properly attach the decorative tip and the dispenser head with the nitrous oxide (N02) cartridge onto the canister.
- Once you’ve attached the components and released the N02 into the canister, shake the can upside down four to five times. Hold the dispenser upside down, squeeze the lever, and watch the whipped cream flow! The first time pulling the trigger, the whipped cream may be a little runny. Just shake it another time and try again.
If you don’t use all of the cream, just store the whipped cream dispenser in the fridge. Remove the decorative tip and place the dispenser on its side in the refrigerator so it doesn’t harden and get stuck at the bottom of the canister. When you want to use it again, lay it out at room temperature for 15-20 minutes and attach a clean decorative tip. Shake it vigorously a few times before dispensing the cream.
I personally have the Pure Vida Whipped Cream Dispenser and I use these No2 cartridges. It’s high quality, and super affordable!

How to Serve:
Here are some of my favorite ways to use this recipe:
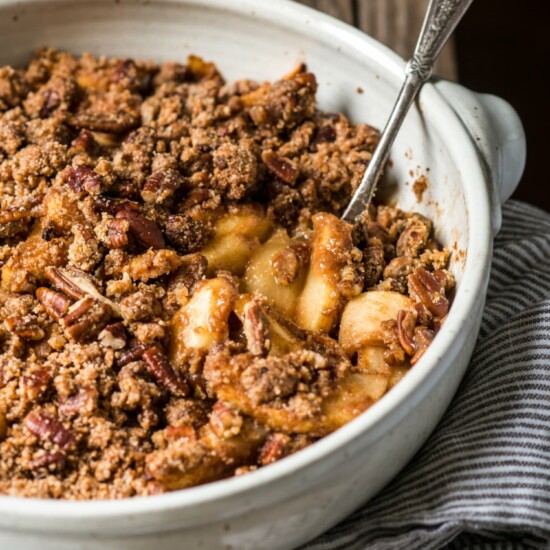
- Baked Apple Crisp (Paleo, Vegan, Grain-Free)
- Dairy Free Chocolate Pudding with Almond Milk
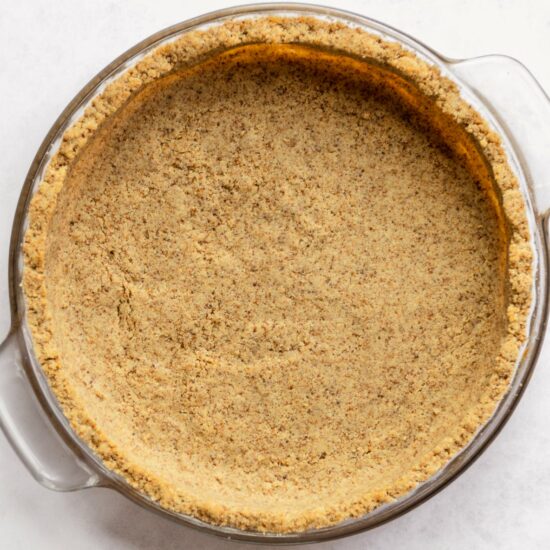
- Dairy Free Key Lime Pie
- The Best Paleo Chewy Chocolate Chip Cookies
Stocking the Pantry
I’ve had this KitchenAid stand mixer for over 10 years and it is durable and works beautifully! I highly recommend it. I personally use Thrive Market for most of my pantry needs because it saves me some cash—especially when it comes to commonly used items like organic powdered sugar and organic coconut milk. For a complete list of my recommend pantry items and what I use in my home, check out my Baking and Cooking Resources Page.
How to Make Coconut Whipped Cream
This coconut whipped cream is light, fluffy, and creamy! It’s super easy and made from a can of coconut milk or coconut cream, so it’s dairy free! Plenty of tips and tricks and my recommend brands included below.
Prep: 5Cook: 5Total: 10 minutes
Servings: 1 cup 1x
Ingredients
- 1 (13.5) oz can full-fat coconut milk or cream, refrigerated overnight
- 3 tablespoons organic powdered sugar (vegan) or 1 tablespoon honey
- ½ teaspoon vanilla extract
Instructions
- Chill: Chill your can of full-fat coconut milk in the fridge overnight. Do not skip or shorten this step. The next day, chill your mixing bowl and beaters in the fridge for 10 minutes.
- Scoop the Cream: Open the can of coconut milk and scoop out the solid cream that has separated to the top into a mixing bowl. Pour the coconut water that remains into a mason jar to use for smoothies or other recipes.
- Beat: Using a hand or stand mixer, beat the coconut cream on medium speed for about 30-45 seconds, or until the cream becomes light and smooth and soft peaks form. Do not over-whip!
- Add Sweetener: Add your sweetener of choice and vanilla extract. Beat the coconut cream until incorporated. If your coconut whipped cream is a little thick, add back some of the coconut water 1 teaspoon at a time until light and fluffy.
- Serve: Serve on top of fruit, baked goods, or hot cocoa. Store in the refrigerator for up to a week.
Notes
- You must chill your can of coconut milk overnight. Even doing it for just six hours is not enough, and you can’t speed this up by putting it in the freezer. Believe me, I’ve made the mistake one too many times! I like to store multiple cans of coconut milk in the back of the fridge at the bottom so I always have a can or two ready to go.
- Using a can of coconut cream? Still chill it overnight and follow the recipe as directed. You’ll need to add more sweetener since you’ll have more cream.
- If your coconut whipped cream doesn’t whip, try adding 1-3 tablespoons of tapioca flour while whipping. You can also thicken the coconut whipped cream by putting it in the refrigerator. Place it in the fridge for at least 2-3 hours to let it firm up.
- If you have extra stored in the fridge, lay it out at room temperature until it softens, then re-whip it as needed.
What did you think about this recipe? If you have tried other brands of coconut milk or coconut cream, please share your experience below! I’d love to hear about it!
Wendy says
Will the cream be form enough to pipe and hold a shape?
Wendy says
FORMED
Noelle Tarr, NTP, CPT says
Hey Wendy! Yes! I did some pipping with a standard icing pipping tip and it worked really well. I recommend using the thai coconut cream for pipping because it’s really thick and will hold its shape well.
Elizabeth says
I love this recipe for whipped cream! I recently tried to do the canister version but it only worked for me the day that I made it. I stored leftovers in the fridge but didn’t get the same results the next day. Any tips on storing and reusing the cream with the canister/dispenser?
Noelle Tarr, NTP, CPT says
Hey Elizabeth!! Awesome! I would lay out the canister at room temperature for just a bit. I think what happens is that it gets a little thick once chilled in the fridge. I’ll experiment with this and update more once I have tested it.
Noelle Tarr, NTP, CPT says
Just did some quick research and found that its best to store the canister in the fridge on its side so that it doesn’t all settle to the bottom and get stuck there. Then lay it out for a bit at room temperature, and shake the canister well before using again.
Susan says
I will be trying this on Christmas Day with the Aroy coconut cream. My question for you is have you seen the Nature’s Charm Coconut Whipping Cream on Amazon? I wonder if that will work as well as Arroy?
Noelle Tarr, NTP, CPT says
I haven’t tried Nature’s Charm, but as long as you chill the can and see a solid separation—thick cream and water, you should be good! Make sure to put the can in the bottom of the fridge at the back.
Wendy says
Have you ever used Sprouts Brand coconut cream? I use it all the time for Chicken Adobo
Noelle Tarr, NTP, CPT says
I haven’t! I’ll have to look into that. Thanks!
Brianna says
Thank you for this recipe! Do you know if the whipped cream will hold up between cake layers? I an trying to make a “naked” vegan cake and looking for something light and refreshing!
Alicia says
I just ran into your site, looking for coconut milk/cream info.
Wow, I am impressed with all in information I found from you.
I have mostly used TJ brand to make coconut rice and stew
type dishes, but now I will expand using your recipes and
will begin with the coconut overnight oats. Thanks for doing
all the homework on brands so we did not have to. I do not
know anything about you or your recipies, but can’t wait to
get started. Thanks
Emily H says
Ok I tried this and it was chunky like there were chunks of coconut oil in it. At least that’s what I think they were? What did I do wrong?
Noelle Tarr, NTP, CPT says
It was probably because of the texture of the coconut milk you used. What brand did you try? Make sure to grab one from the list I recommend above, and pour out all of the water so there isn’t anything that prevents the coconut fat from blending.