This post may contain affiliate links. Please read our disclosure policy.


A mini chocolate cake sandwich in cookie form! These gluten free whoopie pies are soft and fluffy, and filled with a luscious vanilla buttercream. The perfect handheld treat that’s incredibly easy to make!
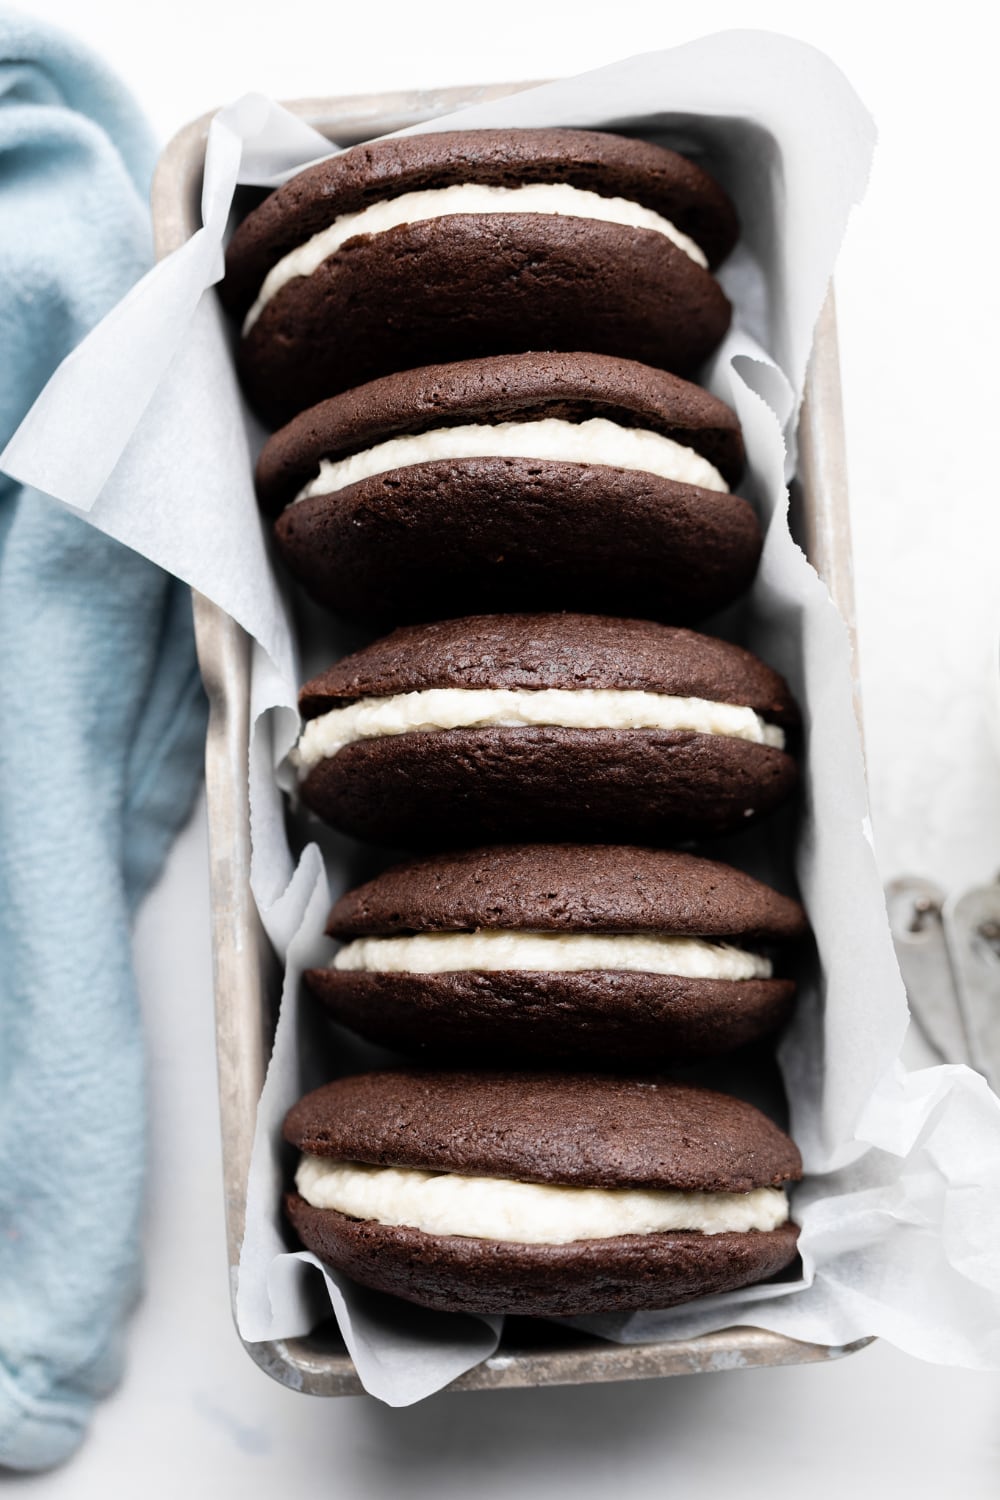
Whoopie pies are one of my favorite gluten free desserts. And as the self proclaimed baking queen—that’s saying a lot! To me, it doesn’t get much better than a mini cake sandwich filled with pillowy vanilla buttercream! In this gluten free whoopie pie recipe, the cookies have a cakey and moist texture, and the buttercream is light and fluffy. You will have no clue the flours are free of gluten, or that the ingredients are healthier!
Jump to:
What are Whoopie Pies?
Oddly enough, nothing about them resembles a pie. Whoopie pies are a treat with Pennsylvania Amish roots. Food historians credit the Amish with crafting whoopie pies from leftover cake batter. When men would find the little pies in their lunch pails, they’d yell “Whoopie!” To be honest, I’d have the same reaction! They quickly grew in popularity in New England in the 1930s after a bakery in Maine started selling them.
What Makes These Whoopie Pies Healthier?
I love figuring out ways to make healthy swaps in desserts without sacrificing texture or flavor. While these gluten free whoopie pies are made with healthier ingredients, they taste exactly like the classic treat—soft and light with a luscious filling! This recipe is:
- Made with whole ingredients: All you need for this recipe is gluten free flours, ghee, unsweetened cocoa powder, egg, and natural sweeteners! You’ll make your own vanilla buttercream filling from scratch with an organic palm shortening instead of Marshmallow Fluff.
- Gluten free: The cookies use a gluten free flour blend and tapioca flour. The tapioca flour is what makes these cookies soft and moist with still being gluten free!
- Dairy free: Ghee is grass-fed butter with all the dairy solids removed. If you want to eliminate the ghee, just swap it out for coconut oil. And you’ll only need coconut milk for the cookies and the filling!
- Naturally sweetened: The cookies are naturally sweetened with maple syrup and coconut sugar. It gives the cookies just the right amount of sweetness!
Simple + Gluten Free Ingredients
There are just a few simple ingredients you’ll need to make these. You likely have most if not all of the ingredients already on hand, so let’s get to baking!
For the Cookies:
- All purpose gluten free flour
- Tapioca flour
- Unsweetened cocoa powder
- Baking soda
- Sea salt
- Ghee
- Coconut sugar
- Egg
- Maple syrup
- Vanilla extract
- Canned coconut milk
For the Filling:
- Coconut milk (or other dairy free milk)
- Powdered sugar
- Palm shortening
- Vanilla extract
How to Make Gluten Free Whoopie Pies
I love how easy it is to make these gluten free! While it’s a unique handheld treat, it couldn’t be easier to make:
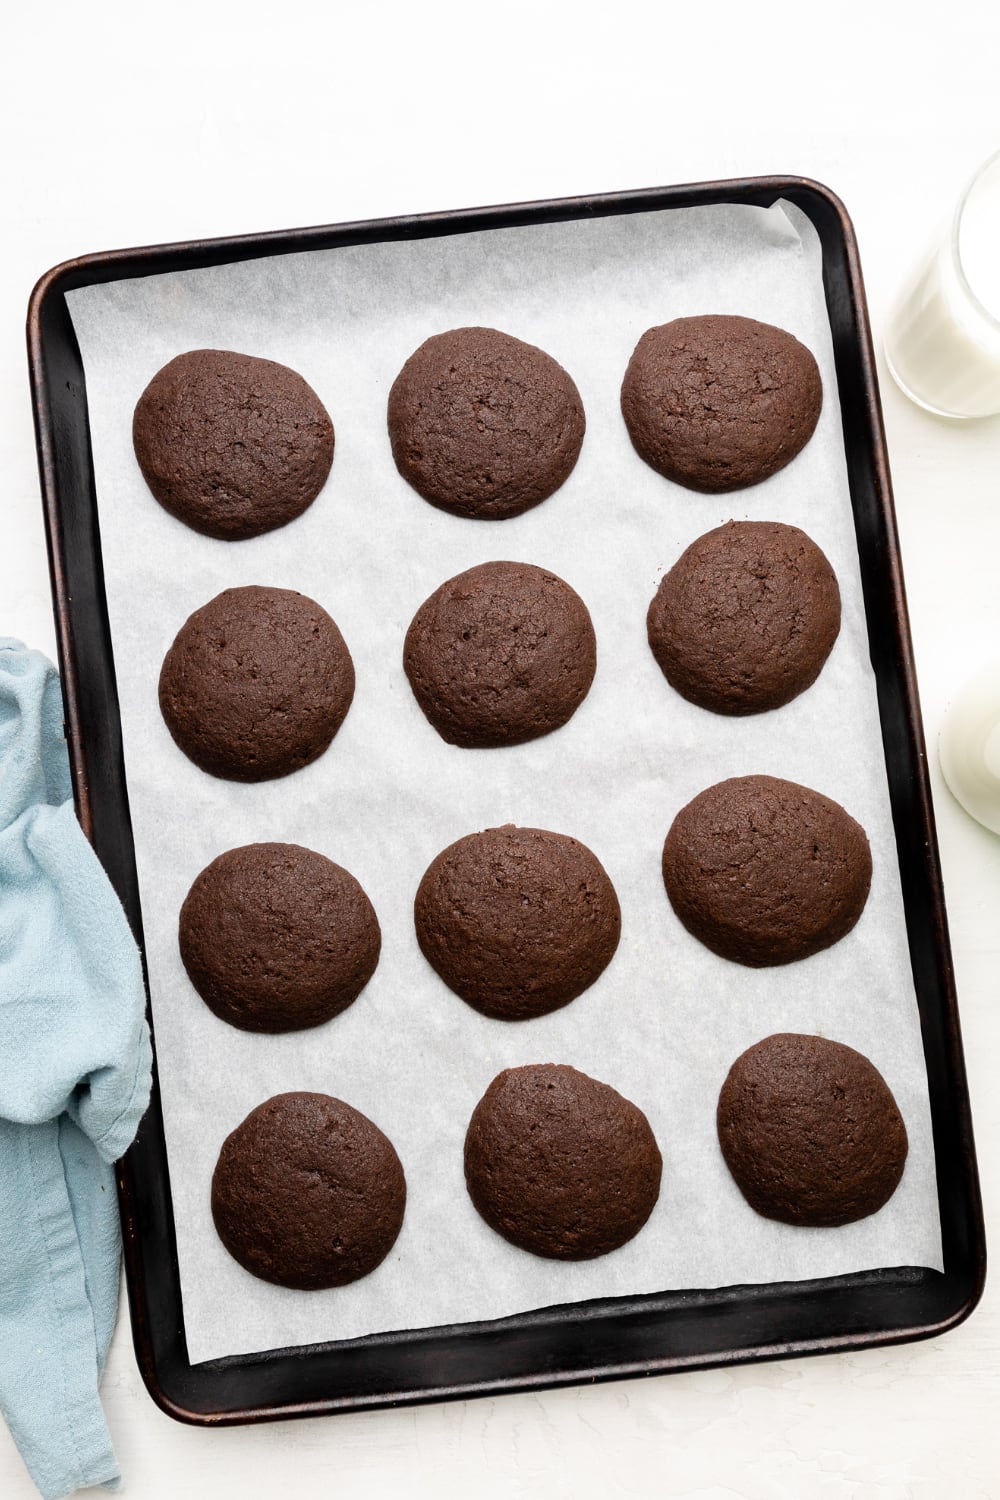
- Prep the oven. Preheat the oven to 350°F. Line two large baking sheets with parchment paper.
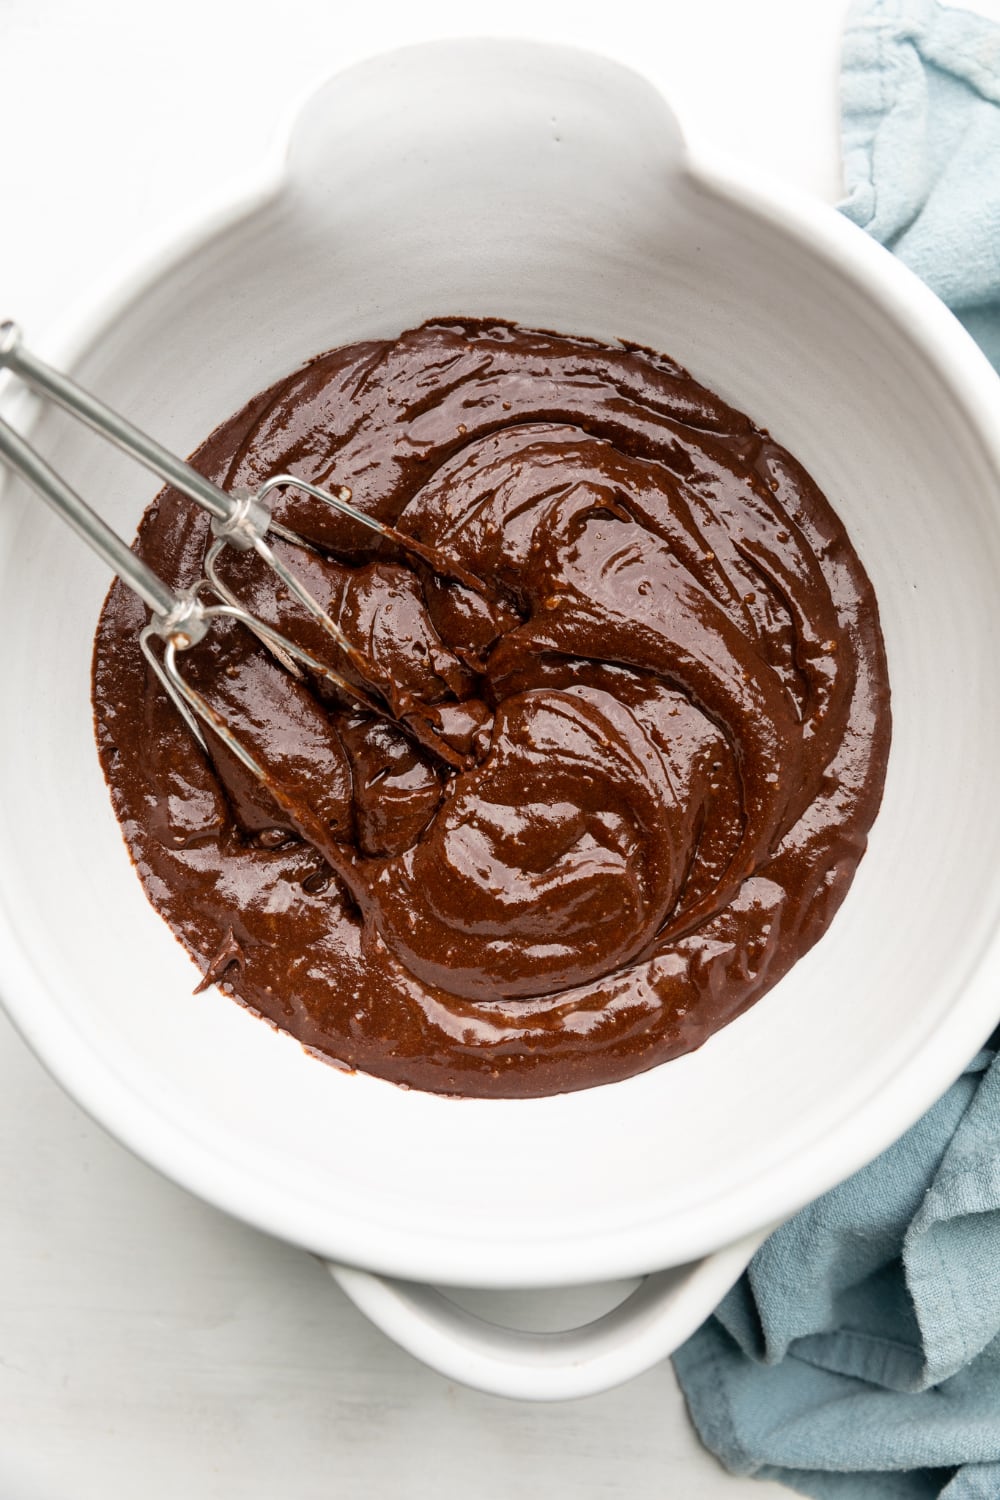
- Mix the batter. In a medium bowl, whisk together the flour, tapioca flour, cocoa powder, baking soda, and salt. Set aside. In a separate bowl, beat together the ghee and coconut sugar. Add the egg and beat until combined. Pour in the maple syrup, vanilla, and coconut milk and mix until combined. Add the dry ingredients to the mixing bowl and mix on low until the batter is smooth and thick.
- Bake the cookies. Using a spring-loaded 2 tablespoon cookie scoop, scoop out the batter and drop onto the prepared baking sheet, spacing the cookies about two inches apart. Bake the cookies for 10-12 minutes. Transfer the cookies to a wire rack to cool.
- Make the filling. In a large pourable measuring cup, combine the coconut milk and powdered sugar and mix until smooth. Using a stand mixer or hand mixer fitted with the paddle attachment, beat the palm shortening for 1-2 minutes until smooth. Add vanilla extract and mix until incorporated. Slowly add the milk and powdered sugar mixture and continue to whip until the filling becomes light and fluffy and no clumps remain, about 2-3 minutes.
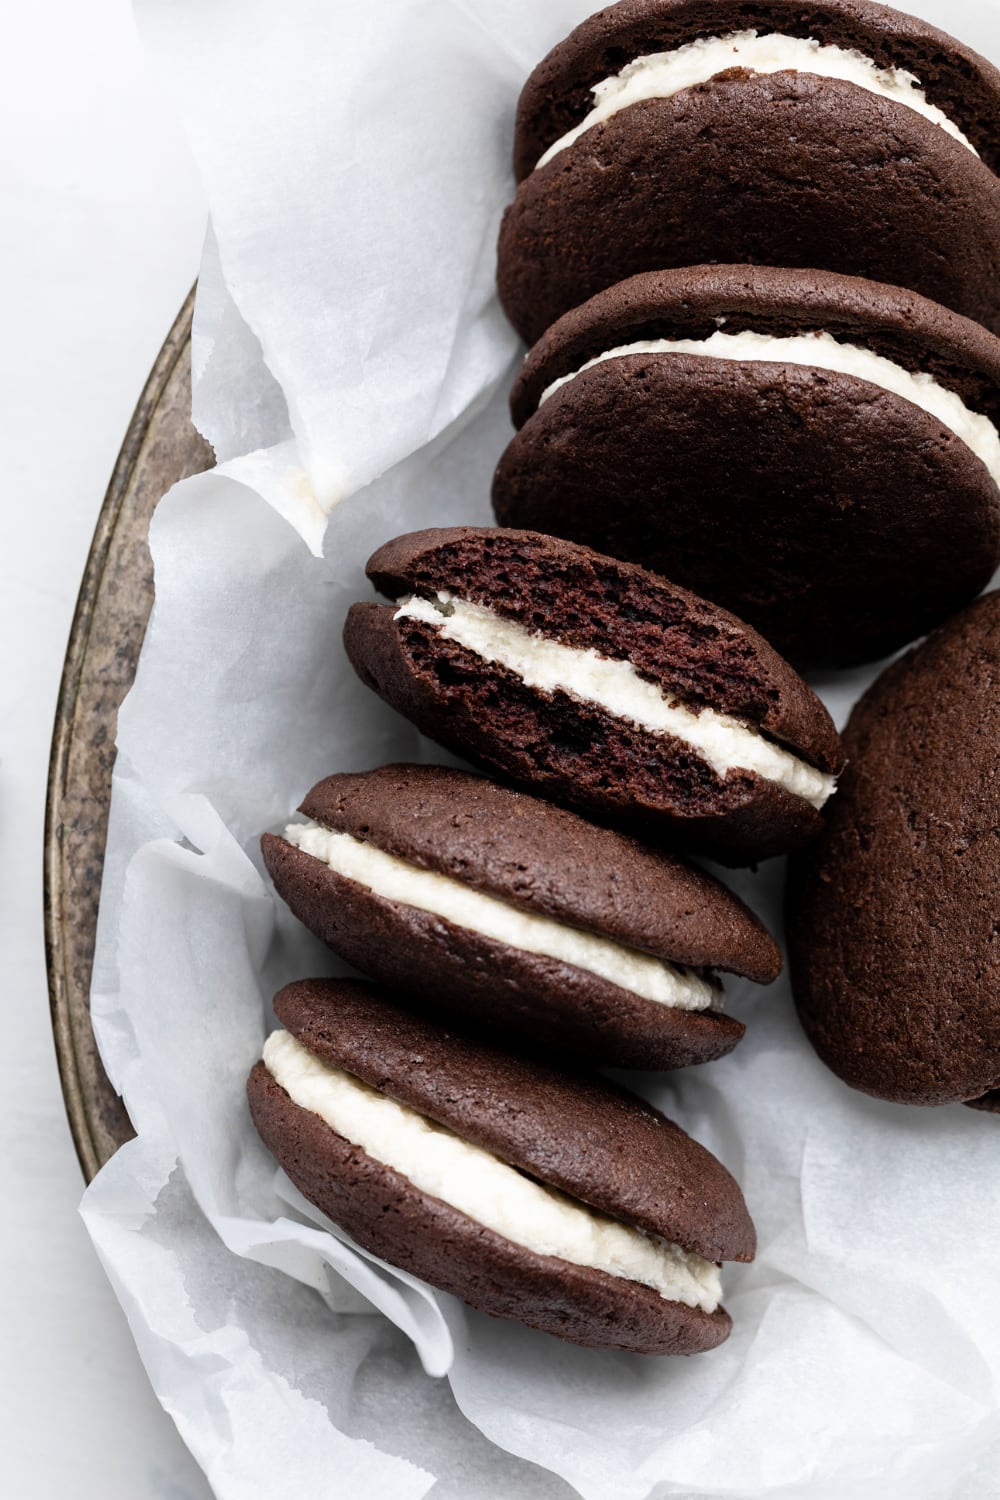
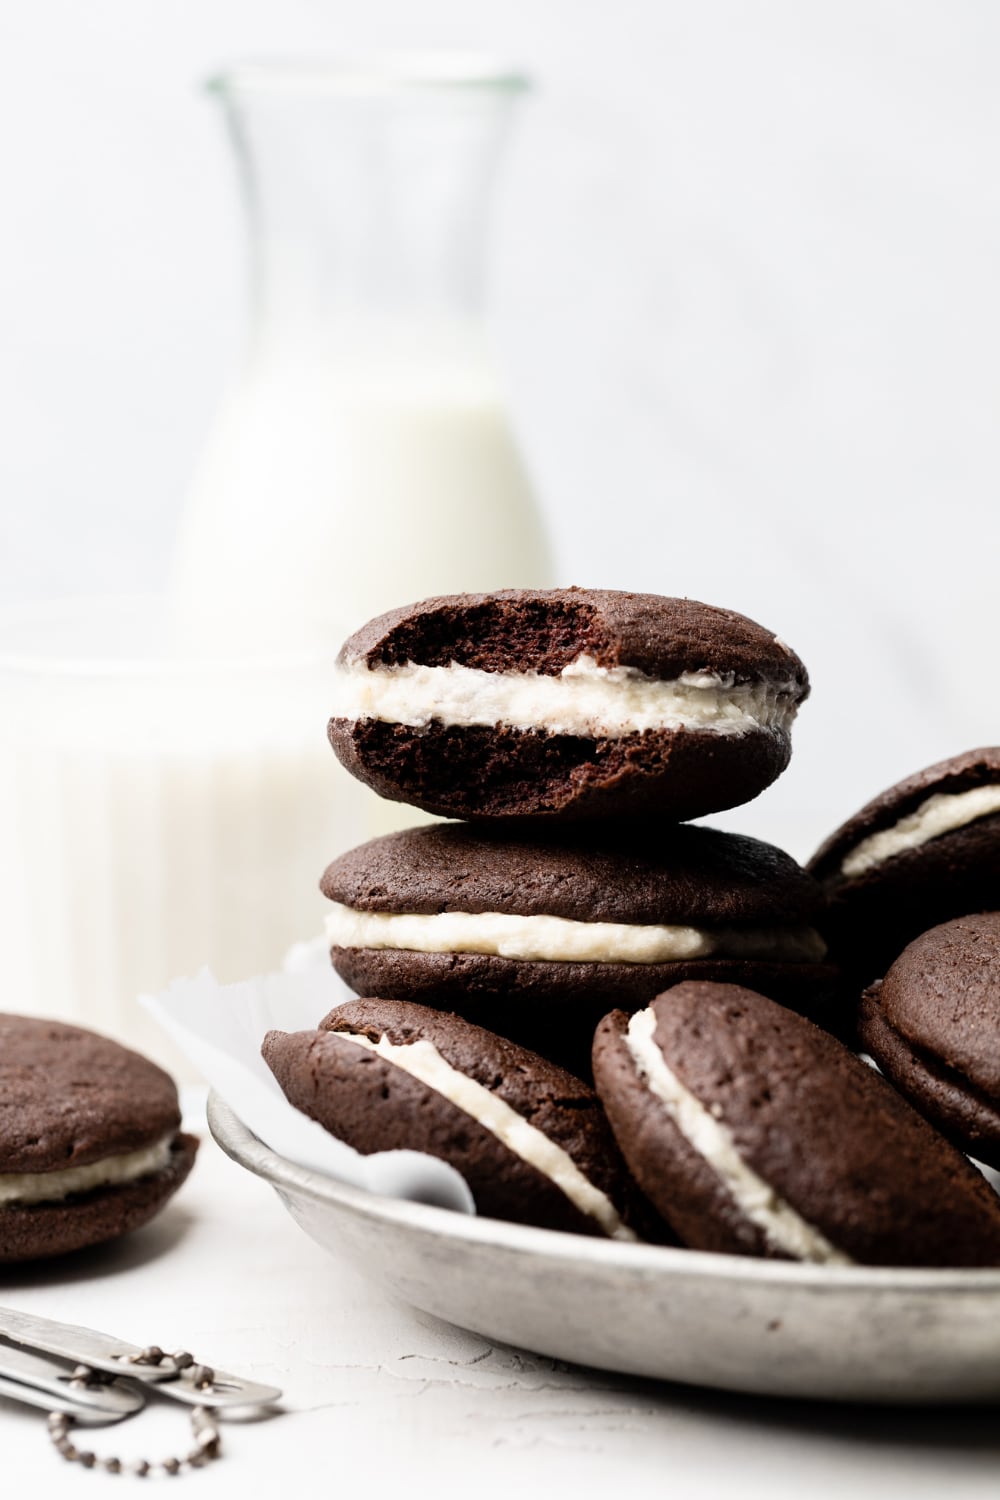
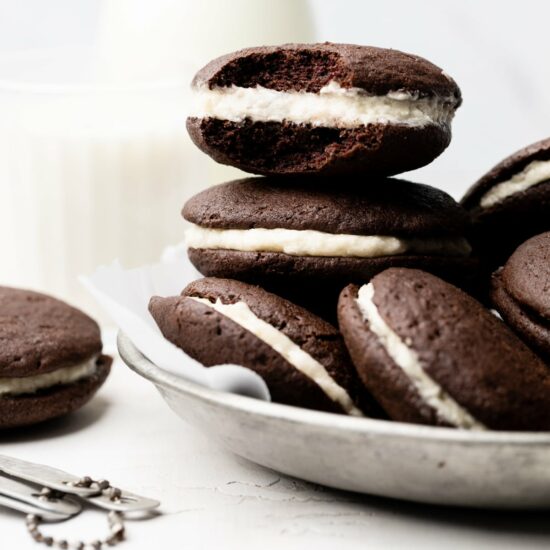
- Assemble the pies. Transfer the filling to a piping bag fitted with a large round tip. Pipe a generous amount of filling onto the flat side of 12 of the cookies. Top with the remaining cookies, flat side down, and twist gently to secure the cookie on top of each pie.
What is Whoopie Pie Filling Made Of?
The most common fillings for whoopie pies are marshmallow cream and vanilla buttercream. A marshmallow cream filling is made from butter, store-bought Marshmallow Fluff, powdered sugar, and a little vanilla. Vanilla buttercream is made from palm shortening, powdered sugar, milk, and vanilla. To keep the ingredients simple, this recipe uses a traditional creamy vanilla buttercream made with organic palm shortening and coconut milk. The filling has a pillowy and fluffy texture—much lighter in comparison to traditional cake frosting.
Baking Tips + Tricks
- A two tablespoon cookie scoop will make this recipe so much easier, and you can use it for many other things! It’s a great investment for meatballs, cookies, and more.
- Don’t scoop out too much batter! The cookies will spread and rise as they bake.
- When measuring liquid ingredients, use a liquid measuring cup for accuracy.
- When measuring the flour, fluff the flour with a fork first, then scoop up the flour with the measuring cup from a container and level it off. Do NOT scoop your flour directly from the package.
- If you don’t have piping bags, just use a gallon ziplock bag and cut a small tip off of one of the corners. You can also just spread the filling using a knife.

Can I Make Substitutions?
Sure can! However, this is where I make that special note that you won’t get the same consistent results if you vary from the original recipe. But, if you find yourself short, here’s a few swaps you can make:
- Tapioca flour: You can use arrowroot flour in a pinch, but this will change the texture slightly as arrowroot is a little more gummy.
- Ghee: Use unsalted butter.
- Coconut sugar: Swap for brown sugar.
- Maple Syrup: This can be swapped for honey. Note: honey is sweeter.
Can I Use a Whoopie Pie Pan?
You can! A whoopie pie baking pan is easy to use. You will need two trays to make 12 assembled pies. Just drop two tablespoons of batter in each cavity. Make sure to spray the baking pan sufficiently to prevent sticking. Baking time may vary slightly, so check for doneness starting at 9 minutes.
Fun Variations:
- Roll the sides of the whoopie pies in sprinkles or sparkling sugar.
- Use my Dairy Free Cream Cheese Frosting or Vegan Chocolate Frosting for the filling.
- Add mix-ins to the buttercream, such as crush candy canes, chocolate chips, or crushed cookies.
Storage + Freezing Info
Store leftover gluten free whoopie pies in an airtight container in the refrigerator for up to 5 days. While it’s possible, I don’t recommend freezing them. To freeze, simply bake the chocolate cookies and let them cool, then wrap each cookie in food storage wrap or parchment paper and store them in an airtight container in the freezer for up to 3 months. Let the cookies thaw, then make the vanilla buttercream fresh and assemble the cookies before serving.
Stocking the Pantry
I personally use Thrive Market for most of my pantry needs because it saves me some cash—especially when it comes to commonly used items like blanched almond flour, ghee, and coconut oil. For a complete list of my recommend pantry items and what I use in my home, check out my Baking and Cooking Resources Page.
Other Recipes You’ll Love
- Paleo Chocolate Donuts
- Fudgy Paleo Brownies (Crackly Top, Gluten-Free)
- Fluffy Paleo Cinnamon Rolls
- Paleo Chocolate Chip Cookies
- Paleo Chocolate Cake with Chocolate Buttercream Frosting
Gluten Free Whoopie Pies
A mini chocolate cake sandwich in cookie form! These gluten free whoopie pies are soft and fluffy, and filled with a luscious vanilla buttercream. The perfect handheld treat that’s incredibly easy to make!
Prep: 25Cook: 12Total: 37 minutes
Servings: 12 whoopie pies 1x
Ingredients
Whoopie Pies:
- 1 ¼ cup all purpose gluten free flour blend (I use Bob’s Red Mill 1-to-1 Gluten Free Baking Flour)
- ½ cup tapioca flour
- ½ cup unsweetened cocoa powder
- 1 ¼ teaspoons baking soda
- ¼ teaspoon sea salt
- ½ cup ghee, room temperature
- ¾ cup coconut sugar
- 1 large egg
- ¼ cup maple syrup
- 1 teaspoon vanilla extract
- ¾ cup canned coconut milk
Filling:
- ¼ cup dairy-free milk (I use coconut milk)
- 2 cups powdered sugar, sifted
- ¾ cup palm shortening
- 1 teaspoon vanilla extract
Instructions
- Prep: Preheat the oven to 350°F. Line two large baking sheets with parchment paper.
- Whisk the Flours: In a medium bowl, whisk together the flour, tapioca flour, cocoa powder, baking soda, and salt. Set aside.
- Mix the Batter: Using a stand mixer or hand mixer fitted with the paddle attachment, beat together the ghee and coconut sugar. Add the egg and beat until combined. Add the maple syrup, vanilla, and coconut milk and mix until combined. Add the dry ingredients to the mixing bowl and mix on low until the batter is smooth and thick.
- Scoop the Batter: Using a spring-loaded 2 tablespoon cookie scoop, scoop out the batter and drop onto the prepared baking sheet, spacing the cookies about two inches apart. You should get 24 individual cookies.
- Bake: Bake the cookies for 10-12 minutes, or until the cakes puff and spring back when lightly pressed in the center. Transfer the cookies to a wire rack to cool.
- For the Filling: In a large pourable measuring cup, combine the coconut milk and powdered sugar and mix until smooth. Using a stand mixer or hand mixer fitted with the paddle attachment, beat the palm shortening for 1-2 minutes until smooth. Add vanilla extract and mix until incorporated. Slowly add the milk and powdered sugar mixture and continue to whip until the filling becomes light and fluffy and no clumps remain, about 2-3 minutes.
- Assemble the Whoopie Pies: Transfer the filling to a piping bag fitted with a large round tip. Pipe a generous amount of filling onto the flat side of 12 of the cookies. Top with the remaining cookies, flat side down, and twist gently to secure the cookie on top of each pie.
- Serve: Serve immediately. You can store the whoopie pies in an airtight container in the refrigerator for up to 4 days.
Notes
- The cookies will spread and rise as they bake, so you only need 2 tablespoons of batter for each cookie. Don’t overdo it!
- You can bake 24 cookies on two large 20-inch baking sheets. If you have smaller baking sheets, you’ll need to do the cookies on three separate baking sheets so they have enough room.
- When measuring liquid ingredients, make sure to use a liquid measuring cup.
- When measuring the flour, fluff the flour with a fork first, then scoop up the flour with the measuring cup from a container and level it off. Do NOT scoop your flour directly from the package. If you don’t fluff your flour or you scoop it directly from the bag, you will pack it into the measuring cup and you’ll end up with too much flour.
- If you don’t have piping bags, just use a gallon ziplock bag and cut a small tip off of one of the corners.
What did you think about these gluten free whoopie pies? I’d love to hear your thoughts—share them below!
Recipe by: Noelle Tarr and Kelsey Hite / Coconuts and Kettlebells | Photography by: Casey Colodny / The Mindful Hapa
casey colodny says
Shared these with a friend and they loved them!! so fluffy and perfectly sweet.
Jaime says
These look amazing! I can’t do potato starch, is there another gf you would recommend?
Noelle Tarr, NTP, CPT says
Any gluten free flour blend will work! If you can’t find any without potato starch, try Bob Red Mill’s Gluten Free Paleo Baking Flour.
Olivia Hamilton says
Hi, I’m not sure if you’re aware but that Ghee is not dairy free. What would you suggest to use in place of that for someone who is completely dairy free?
Noelle Tarr, NTP, CPT says
Hi Olivia! I address ghee and how to make this dairy free in the second section. “Dairy free: Ghee is grass-fed butter with all the dairy solids removed. If you want to eliminate the ghee, just swap it out for coconut oil. And you’ll only need coconut milk for the cookies and the filling!” Hope that helps!